Building mobile app prototypes with Keynote
Mar 4th, 2017
This blog post is based on a talk I gave in Boost Turku's Design Tuna: Prototyping event on Thursday March 2nd.
In my work I constantly meet young entrepreneurs with a business background and an idea for a mobile app. Often people are looking for a programmer to build their idea into reality but don’t know when to start. Here’s a quick guide to getting started with your idea with zero programming using tools that almost everyone is familiar.
Introduction
Keynote (and Powerpoint) allows us to link different objects inside slides to link to another slides. We are going to use this feature to build a click-through mobile app prototype that can be as crude or detailed as you wish.
Keynote is really good as the first step. When you get further in the development, you might want to start using some apps specifically built for mobile app prototyping such as Invision or Proto.io. However, jumping straight into these tools usually makes you think too much about details that are not meaningful in the beginning.
Step 1: Setup
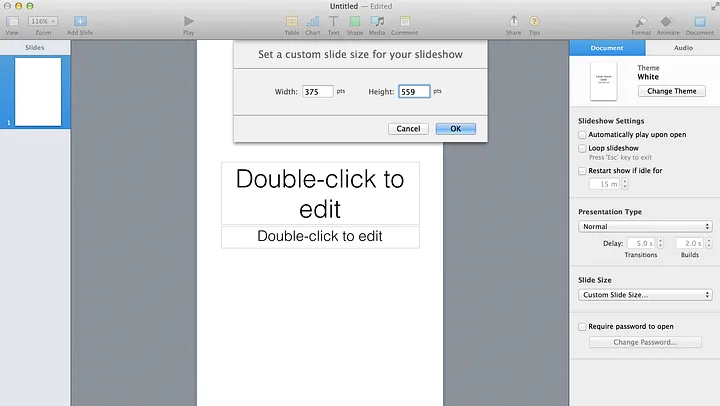
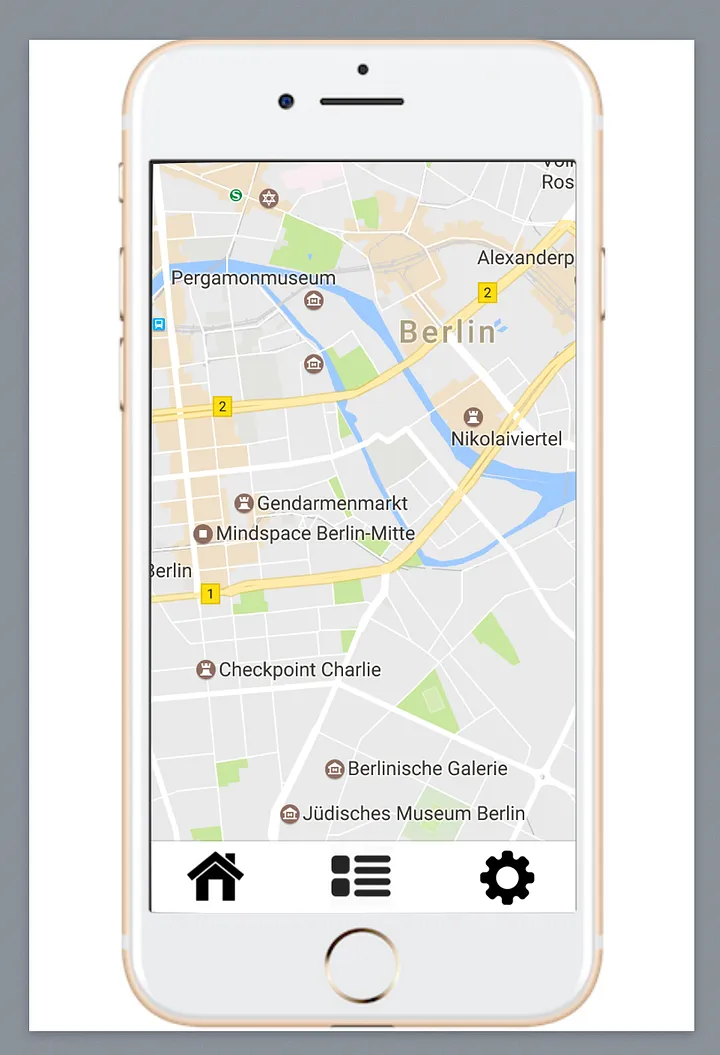
First, we need to set a custom slide size. Choose Document tab in the right hand side and select Custom slide size… . I chose 375 x 559 pts since that ratio matches the ratio of iPhone 6/7 screen size.
Second, we need to change the Presentation Type in the same panel to be Links only. This will prevent the slideshow from proceeding to next slide when we click outside selected elements.
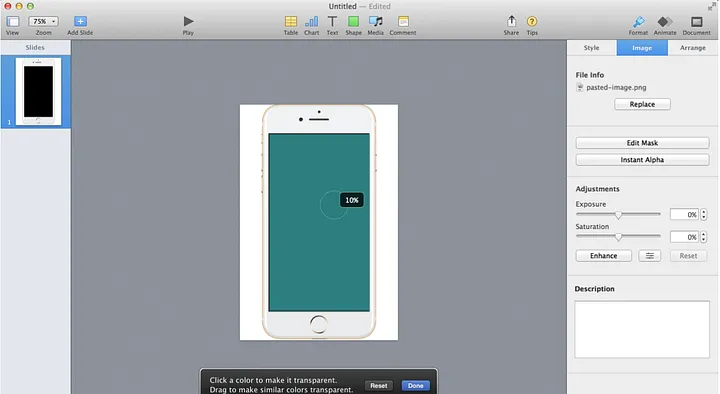
Last, we need a mobile phone mockup to make the prototype look like it’s inside a phone. I use MockUPhone and then add iPhone 7 image to Keynote. Select Format -> Image tab and use Instant Alpha feature to change inside of the phone to make it transparent.
Now the setup is ready and we can start building the prototype.
Step 2: Basic layout
Depending on your skills, you might have a layout built in Photoshop or similar or — if you are like me — you just start googling for stuff and using stock objects and icons. Remember, in the first prototype it’s important to just convey the message of what you are building and how it operates. It doesn’t have to be exactly like your final product.
In this example, I’ll show how to build a simple app for apartment rental app. We’ll have a map view and detailed views with images.
We need to start with a map. I just open Google Maps, open a suitable view and take a screenshot. When taking screenshots, always take a bit larger piece than you need. This will give you little bit to work with when adjusting.
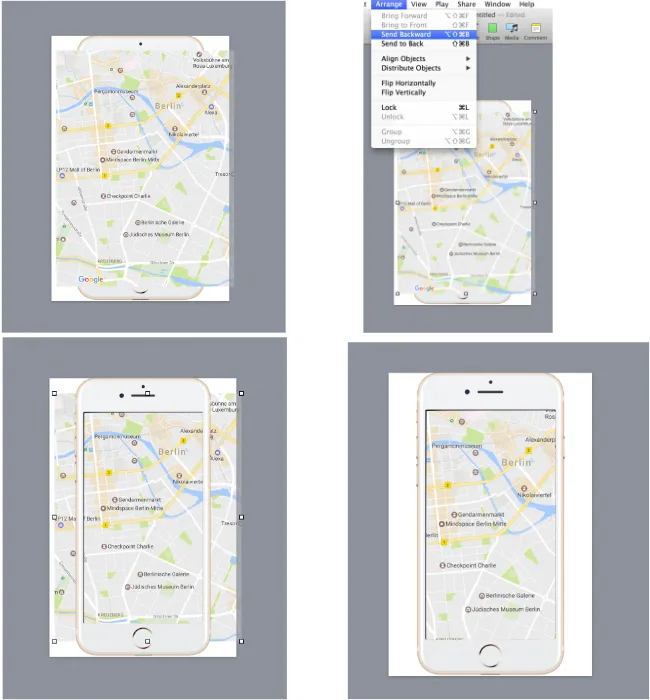
- Paste screenshot to Keynote
- Move it behind the phone layer.
- Position
- Crop with Edit mask feature
Next, we want a navigation bar. I’ll be using a white rectangle in combination with free icons from sites like Flaticon or Iconfinder.
Once we have the nav bar and other basic elements set up, we can start building the functionality.
First, I want the Home icon to always point back to the first slide. Right click on the icon and select Add link.
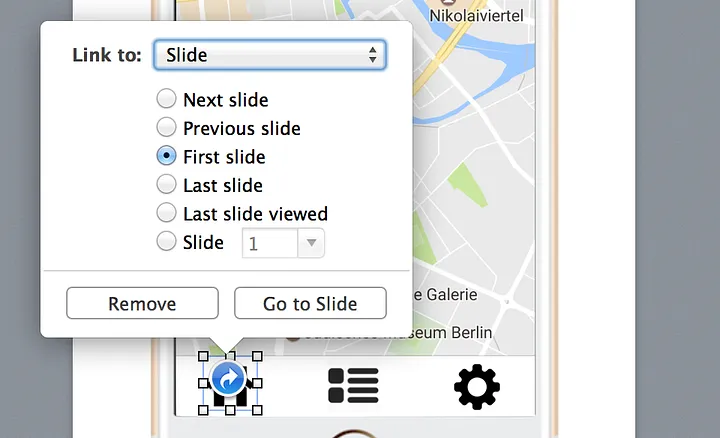
Now we can duplicate this slide a few times to create the basis for different views. I want the second icon to link to the Slide 2 where we will create a listing view and the third icon to link to Slide 3 for settings page. Note that you need to have the slides existing before you can link to them, so you need to create those slides (by copying the first one) and then add links. Also, update the navigation links to these new slides as well.
Step 3: Functionality
Now we can go for a test ride. Start a slide show and click around. Make note of any non-working links to go back and link them correctly. If your slide show advances when you missclick, check out the settings in Step 1: Setup.
From here on, it’s all about your imagination. You can use the animations provided by Keynote to build more advanced transitions and splash views for opening the app etc. You can even export it to pdf if you want to make your prototype easier to share with friends.
Conclusions
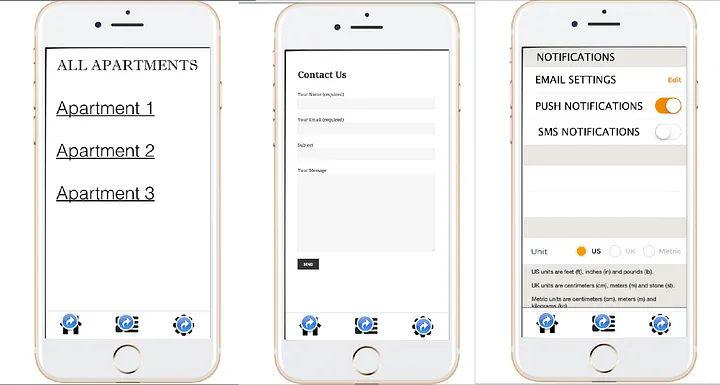
Building this prototype with 7 different views (map view, listing view, settings view, 3 x detailed view & contact form view) took me about 30 minutes to build. This means you can start building your prototypes right away, spot easy mistakes in usability by clicking around, present to potential developers or users and move on building the real software.
If something above resonated with you, let's start a discussion about it! Email me at juhamattisantala at gmail dot com and share your thoughts. This year, I want to have more deeper discussions with people from around the world and I'd love if you'd be part of that.