Documentation pages from dotfiles with config-renderer
Apr 1st, 2024
Dotfiles are used to configure many parts of operating systems and tools. They usually grow and evolve over time and the commands ran in them might not be the most understandable.
They can be especially cryptic in files that you touch maybe once when you set up a new laptop or once every year. My dotfiles are collections of snippets copied from other people’s examples and suggestions over the years and I don’t always remember what they do or what options there are.
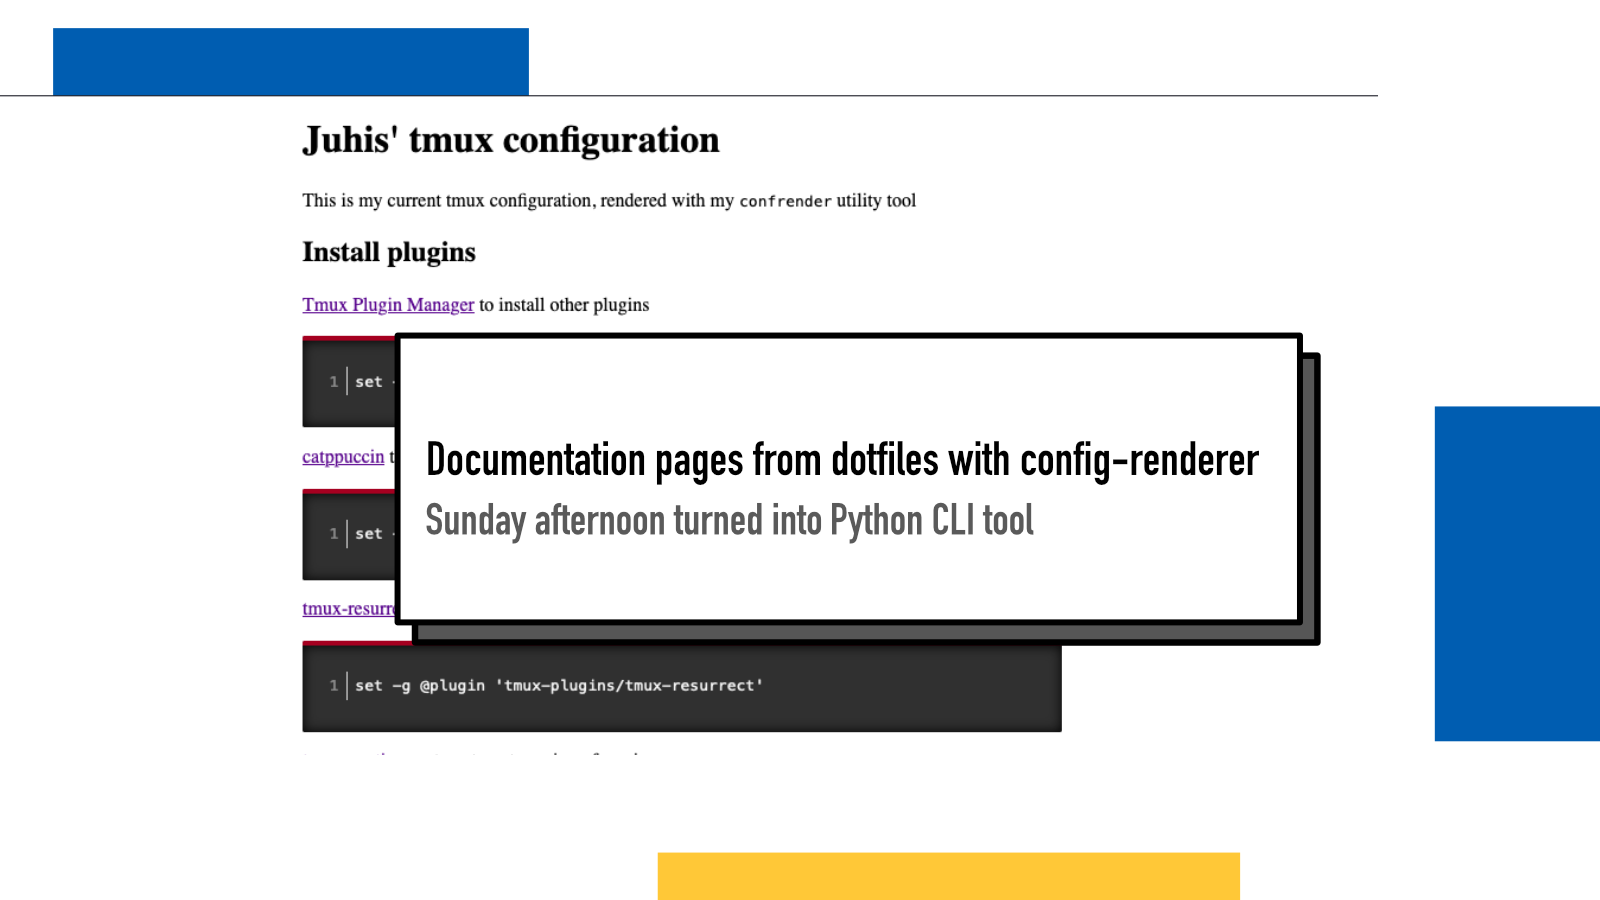
On one Sunday afternoon, I started thinking about this problem as I had been working on my tmux configuration.
A .tmux.conf file might look something
like this:
set -g @plugin 'tmux-plugins/tpm'
set -g @plugin 'catppuccin/tmux'
set -g @plugin 'tmux-plugins/tmux-resurrect'
set -g @plugin 'tmux-plugins/tmux-continuum'

bind r source-file ~/.tmux.conf

set -g prefix C-s
set -g mouse on

# split panes using | and -
bind | split-window -h
bind - split-window -v
unbind '"'
unbind %

# switch panes using Alt-arrow without prefix
bind -n M-Left select-pane -L
bind -n M-Right select-pane -R
bind -n M-Up select-pane -U
bind -n M-Down select-pane -D

run '~/.tmux/plugins/tpm/tpm'
Maybe there are some comments here and there, maybe not. I often find not very useful comments in mine. Reading comments is not also always a great experience because many code editors make comments harder to read to reduce clutter.
config-renderer
I opened my code editor and started writing some code. That code turned into config-renderer, an open source Python command-line utility that turns a dotfile into an HTML page.
Every line of code in the config file is put into a
code block: multiple consecutive lines
without empty lines or comments are put into a shared block.
The magic is in every other line. I created a simple markup “language” to give a bit of flexibility for what to render.
The first line of the file is turned into a title. It should be in format of
# TITLE. This title is used in html’s
title and
h1 tags.
Everything else that starts with a # is
rendered based on what follows:
-
#~is ignored, it’s like a comment inside a comment for when you want to leave something for the config file reader only -
#> classcreates a div with class of class and#<closes it. I added these so you can style different sections differently. -
# [Heading]gets rendered ash2heading withHeadingas the content. No other levels of heading are supported for now. -
Anything else that starts with
#is turned into a paragraph. Multiple consecutive lines are put into the same paragraph so you can freely break lines mid-sentence.
- So called “naked links” like https://example.com are turned into clickable links
- Markdown-style links like [Example](https://example.com) are turned into links with the text inside brackets being the content.
-
-s, —style FILEoption allows inserting external CSS file into thestyleelement of the page -
-b, --body-onlyskips writinghtml,headandbodytags and only writes the rendered content. This is so it’s easier to embed them into existing sites. -
-o, --output FILEdefines the output file, defaults toconfig.html. -
--class-prefix PREFIXallows user to add custom prefix to CSS classes applied to elements. If not set, they are prefixed withconfiguration-.
I used docopt library to build the command-line interface and argument parsing and it’s such a delight to use. With it, you write the CLI interface into the docstring of the file and that gets parsed into functionality that takes care of parsing and validating command-line arguments.
I’ve been a fan of the tool for years now.
Example page
With an example tmux configuration and a sprinkle of custom CSS, I created an example page so you can see what the output looks like.
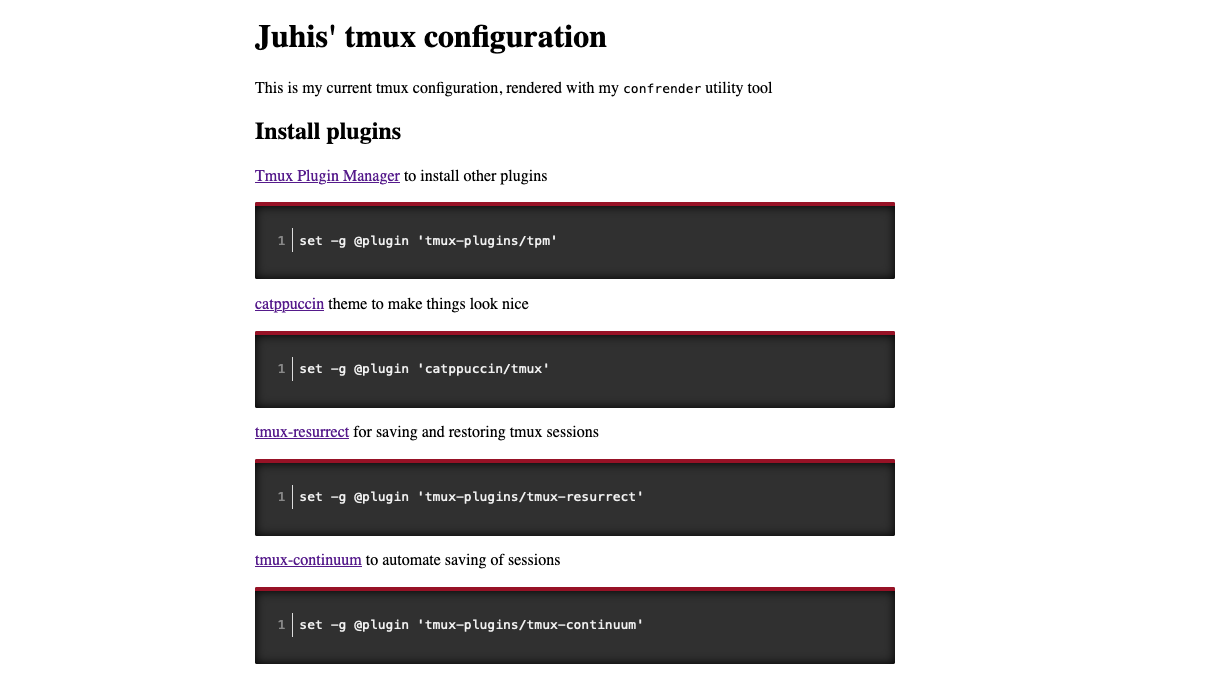
The tool itself doesn’t create any styling so you need to provide your own stylesheet.
config-renderer in PyPi
I also used this opportunity as an excuse to finally learn how to build Python packages and publishing them in PyPi.
After a bit of stumbling around, I managed to transform the project into a
shape that passed through all the tools and it can now be run on the command
line with pipx run config-renderer 😍.
I’m so proud!
https://pypi.org/project/config-renderer/
If something above resonated with you, let's start a discussion about it! Email me at juhis@hamatti.org and share your thoughts. This year, I want to have more deeper discussions with people from around the world and I'd love if you'd be part of that.