Website rewrite and switching to Notion as CMS
Aug 22nd, 2023
I built this current website with Eleventy 0.8 in early 2019. I would write my blog posts with Markdown inside VS Code, build with Eleventy and deploy to Netlify. And for a while, it was good. In early 2020, I made the first bigger upgrade as I started using Ghost as a headless CMS. The main reason for that was to get a better writing and editing experience for writing blog posts.
And it worked wonders for a long time. Somewhere around 2021-2022 I started to feel the desire to get a bit more customizability out of my CMS but since I was having a good time writing weekly blog posts, I did most of those by hand in the downloaded files.
Another problem was that I had originally taken the layout from a website that offered free layouts but the HTML and CSS wasn’t that great, especially given the lack of proper HTML landmark use. Some of my own additions weren’t very good for responsive use either so there were a lot of smaller issues like those in my codebase.
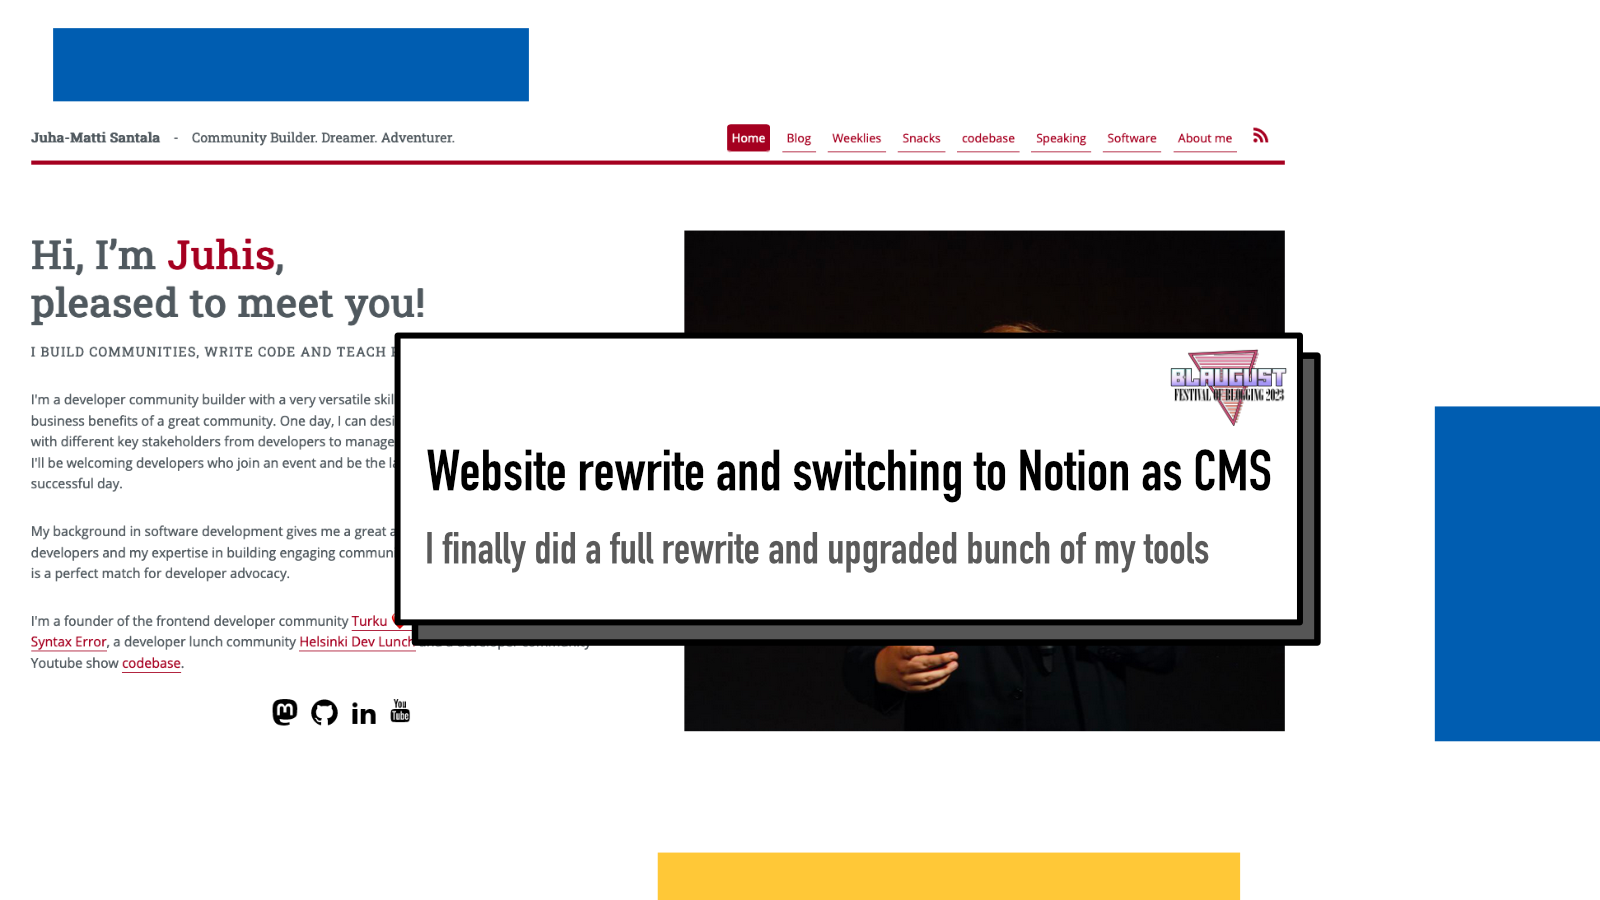
In August 2023, I did a complete rewrite of HTML, CSS and Javascript, upgraded my stack (hello Eleventy 2.0!) and as the final major step, switched from Ghost to Notion as my headless CMS. The site looks mostly the same but there are a few visible changes as well.
Rewrite of HTML & CSS
The first, roughly 50 hours, I spent completely rewriting the website and bringing in all the content from the old repository. I started with a completely blank repository and added files one by one to achieve the result I wanted. During this, I learned I have a ton of content here.
I managed to make the website way better for mobile use and more prepared for making new changes and updates.
The main navigation on the top was improved a lot for mobile, I added a sidebar to my blog for the first time (only on wider displays) which also inspired me to properly start using categories/tags – I had added them in my blog posts but they weren’t visible on the old site. Now you can find more blog posts of the same category through the sidebar or individual blog posts.
As I was working with categories, I read
Lea Verou’s recent blog post from her own website renewal project. I’ve never had made a distinction between categories and tags and mine are
very flat but her thinking especially around the hierarchy of tags (for
example, css-backgrounds tag should
always also be tagged css but not the
other way around). For me, it’s too early to think about that but as my tag
usage probably improves now, I might consider something along those lines.
The sidebar also shows a few of the most recent blog posts (personally I find it so helpful as I’m always linking recent posts everywhere) and I’m working on adding a blog roll to promote blogs from people who write about similar topics and which I enjoy reading.
Another improvement I made is for the navigation and that’s starting to use
aria-current="page" with background
highlight to indicate which section the reader is on my site.
I also made a lot of different pages and typography and such much more unified in style as my old approach was all over the place.
Backend updates
Updating to Eleventy 2.0 didn’t bring much visible changes yet to my flow but one big change I made was to integrate the deployment through GitHub.
My old flow was to download blog posts via Ghost API or make changes to static
pages, then manually build with
eleventy build (I was still on version
0.9...) and deploy to Netlify with
Netlify CLI’s netlify deploy (for
preview) and netlify deploy --prod (for
production).
Now with the new flow, I push changes to GitHub. If there’s a new change in
main branch, Netlify will deploy that to
production and update my site. If I make a pull request, Netlify will create a
draft deployment and comments a link (and a QR code for mobile) to my pull
request. I can then take a look, make adjustments and when I merge it in, it
will automatically trigger a production build.
A big improvement this gives me is that I can make small fixes like fixing typos or links or adding missing attributes to posts without needing to have full environment to make website builds. This was somewhat of an issue with the old setup because it had not been maintained well so it was hard for me to make changes to the website with anything but my main laptop.
Now I can even make the changed directly through GitHub’s UI and get it deployed. Or clone the repository on any computer, make a fix and deploy that.
Another major improvement this new flow made possible for me was to prepare blog post releases in a git branch, then make a pull requests and all I need now to publish my post is to merge the PR from GitHub’s UI and I can do that on mobile which opens up a lot of new opportunities for me. During this month, at times I’ve had 3 PRs ready for publishing as I’ve written blog posts ready to wait for daily publishing.
Using global data files with Eleventy
My original build didn’t do much with global data files. However, when building a new site for one of my communities, I used them extensively since I wanted a more data-driven build for that site. Then I built a small example/starter kit for a friend with them: https://github.com/Hamatti/minimal-11ty-json-example. And when I started doing this rewrite, I decided to use them way more.
A big part of that is that they enable me to create a system that can then later be replaced with a CMS integration if I so desire.
/uses page example
One example of these is my /uses page. Instead of writing all that in Markdown or HTML, I created a JSON file with a structure that looks like this:
[{
    "categoryName": "Software & Services",
    "items": [
      {
        "name": "Mozilla Firefox",
        "description": "My main browser choice is Firefox. I want to avoid Google's products as much as I can and Safari never hit off. As an Mozilla alumnus I also have an emotional connection with the Firefox community.",
        "url": "https://www.mozilla.org/en-US/firefox/new/"
      },
      {
        "name": "VS Code",
        "description": "I use VS Code as one of my code editors.",
        "icon": "editor",
        "url": "https://code.visualstudio.com/"
      },
      {
        "name": "vim",
        "description": "I use vim as another of my code editors.",
        "icon": "editor",
        "url": "https://www.vim.org/"
      },
      {
        "name": "Notion",
        "description": "My main (and one of many) note taking app/service. I keep mostly long-term planning stuff there and do most of my daily note-taking with either a physical notebooks or iPad.",
        "url": "https://notion.so"
      }
}]
It’s an array of categories and each category has a
categoryName and
items and each item contains stuff, of
which most is optional. I then populate my page from these with a Nunjucks
file:
---
layout: layouts/base.njk
title: /uses page
---

<section id="uses">
  <h1>/uses page</h1>
  <p>Inspired by many other developer's <a href="https://uses.tech/" target=_blank>/uses pages</a>, here's some of my daily tools.</p>

  <div>
    {% for category in uses %}
      <h3>{{category.categoryName}}</h3>
      <ul>
        {% for item in category.items %}
          <li>
            <p>
              {% if item.url %}
                <strong>
                  <a class="external-link" href="{{item.url}}" target=_blank>{{ item.name }}</a>
                </strong>
              {% else %}
                <strong>{{ item.name }}</strong>
              {% endif %}
            </p>
            <p>{{item.description | safe}}</p>
          </li>
        {% endfor %}
      </ul>
    </div>
  {% endfor %}
</section>
Now, if I ever feel the need to manage this data in other means than manually writing a JSON file, I can manage it with some kind of JSON editor client or replace it with an API connection, as long as the output JSON matches the format.
And to make that JSON creation faster inside VS Code, I created a custom snippet for the project:
{
  "/uses new entry": {
    "scope": "json",
    "prefix": "uses",
    "body": [
      "{\"name\": \"$1\", \"description\": \"$2\", \"url\": \"$3\"}"
    ],
    "description": "Add new entry to /uses JSON"
  }
}
Saved in my .vscode/ folder as
uses.code-snippets, I can invoke it by
typing uses + Tab and then fill in the
content.
I have other global data files for other similar use cases and at least so far it feels really good, way better than writing these directly in Markdown or HTML.
They are not a perfect fit for everything though, only for things that are very structural. I tried same approach when experiment with a /now page but it didn’t feel good. So /now page will need to wait for another inspiration.
A 404 page with featured content
I decided to get the best out of the 404 page by showcasing some of my best work from my blog. I always felt a “nothing here” page was a missed opportunity.
I added a featured: true to a few of my
older blog posts, created a custom collection:
eleventyConfig.addCollection('featured', (collection) => {
  const allPosts = [
    ...collection.getFilteredByGlob("posts/*.md"),
    ...collection.getFilteredByGlob("posts/*.njk"),
  ];
  const posts = allPosts.filter(
    (post) => post.data.featured && !post.data.draft && !post.data.external_url
  );
  posts.sort((a, b) => moment(b.data.date) - moment(a.data.date));

  return posts
})
and looped over them in my 404 template:
<div class="featured-404">
  {% for post in collections.featured %}
    <div class="featured-post">
      <img src="{{ post.data.image }}"/>
      <h2>{{ post.data.title }}</h2>
      <p>{{post.data.description}}</p>
      <div class="featured-cta">
      <a href="{{post.url}}">Read the post</a>
      </div>
    </div>
  {% endfor %}
</div>
You can see the result if you visit a page that doesn’t exist, for example /404.
As a side note, I really enjoy how it easy it is to create collections in Eleventy.
The Big Question: Switching my headless CMS
A main reason why it took me so long to get started with the rewrite was that I felt like getting started with a new CMS and migrating to that would be such an insurmountable project. I had tried setting up Contentful a few times as I had used it at work previously and knew I could do any content models I wanted. Then I had a discussion with a friend who mentioned Strapi so I installed that and tried it but setting up those models felt very time consuming and what was the worst, neither of those had a fantastic editor experience.
I had originally moved to Ghost because it had a very similar experience to Medium where I disliked almost everything else but loved the editor. Similar reason why I had used Notion for my note taking and planning for years.
And then my friend said this, as a mostly side mention in a more detailed discussion of other things:
Another unexplored possibility is using Notion API
I didn’t make much of it and didn’t comment on it. Until then one night after I had deployed the other part of the website renewal without too many issues. I started wondering. “How hard could it be to set up Notion as my headless CMS?”
I used Notion all the time, on all my devices and I was very comfortable with it. I loved the block-style writing experience, the slick UI and I knew I’d enjoy writing on it because that was what I had been doing for so long.
So I googled: “Using Notion API as headless CMS”. Without the proper capitalization, of course. I found a few blog posts that focused on the website side of things (somehow, most of them were Next.js projects, just an interesting side bit).
And I struggled to set things up in Notion. Probably a third of my time was spent on figuring out how to set it up on Notion and then coding the API integration part for my blog was rather straight-forward for me, mostly took time because there was a lot of code to write and testing to do.
Setting up headless CMS in Notion
At the time of writing, Notion is on version
2.1.15 so if you’re reading this way in
the future, some things may have changed. I’ll make a note here if I make any
updates to this due to Notion’s changes.
First, create a new page in your workspace and create it as a Table
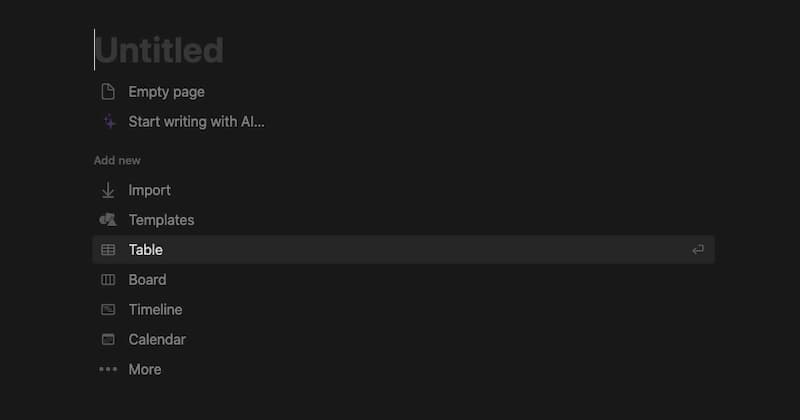
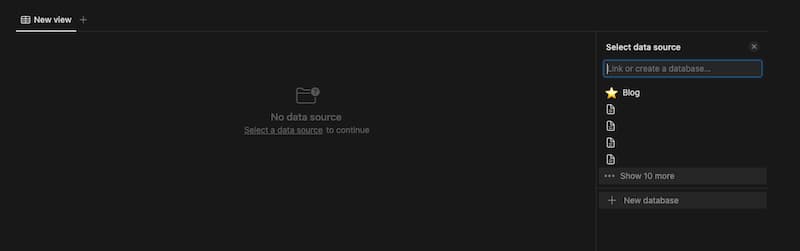
In Notion, tables and databases are the same and to my understanding is used indistinguishably from each other in their documentation and guides. After creating a table, Select a data source and select + New database on the right.
We want to set up a table where each blog post is a row, each column is a property and by opening the page, we get access to the page where we can write the blog post itself.
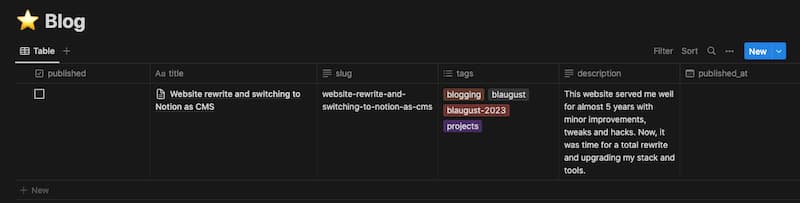
What I like about this is that it’s very flexible to add new properties and edit those properties. Compared to Contentful or Strapi, I don’t need to go to a different page to set up the content model and then come back and edit all the blog posts individually.
This flexibility comes with a cost. It works for me because I’m playing all the roles: I maintain the CMS structure, I write the blog posts and I write the code that integrates it to the website. If any of these three are split between different people, then I recommend being more careful.
API integration in Notion
Next, you need to add an integration. I found this part very well documented in Notion’s side and it’s likely the part in this post that is most likely to change a bit here and there so I won’t go into step-by-step instructions for that here.
In nutshell, you need to:
- Create a new Integration
- Give it Capabilities (I only allowed it to read content as I’m using this one-way only) (in other terms these define what permissions this integration has to your Notion)
- Take note of the Secret Key provided. Never share this with outsiders but save it to your blog’s environment values. Do not store this in version control. Anyone with access to this secret will be able to read what you have in your connected Notion database.
- Connect your blog table created earlier with this new integration.
- Copy database ID (I wish they made it more visible somewhere, now you need to copy the link and extract it from there) and store that to your environment values as well.
Fetching blog posts in your backend
My workflow is as follows:
- I write a blog post in Notion
-
I run a command
npm run notionin my terminal which runs a script I’ve saved in_scripts/notion.js. This fetches the blog post(s) from Notion API, creates front matter based on the properties (columns in the table) and renders HTML from the blog content and combines them into a file that it saves to/posts/from where Eleventy builds them into my blog and RSS feed.
// Get Notion client for calling the API
const { Client } = require("@notionhq/client");

// Read environment values from .env file
require("dotenv").config();

// Initialize Notion client with the auth secret key
const notion = new Client({
  auth: process.env.NOTION_SECRET,
});

// A function to download posts (minimal example)
async function getPosts() {
  const myPage = await notion.databases.query({
    database_id: process.env.NOTION_BLOG_DB_ID
  });

  // Only return posts that are not drafts and have been published
  return myPage.results.filter(
    (post) => !post.properties.draft.checkbox && post.properties.published.checkbox
  );
}
I have built a few extra features for my blog, for example if I pass on a Notion page ID to my command, it will only fetch that and does it regardless of its draft or published status. This allows me to fetch posts during writing and editing process to see how it looks like in site while writing.
// My main function that is run when `npm run notion` is called
async function run() {
  // Get all the posts from function above
  const posts = await getBlogPosts();
  await Promise.all(
    // For each post
    posts.map(async (post) => {
      let { id, properties, url: notion_url } = post;

      // Get all the blocks for this page
      let resp = await notion.blocks.children.list({
        block_id: id,
      });
      let { results } = resp;

      // Query limits blocks to 100 so let's loop until
      // we have all of them
      while (resp.has_more) {
        resp = await notion.blocks.children.list({
          block_id: id,
          start_cursor: resp.next_cursor,
        });
        results = [...results, ...resp.results];
      }

      let {
        title,
        description,
        published_at,
        feature_image,
        draft,
        slug,
        tags,
        mastodon_id,
      } = properties;

      // Notion's data is very detailed and inside objects
      // that are not documented so well.
      // I console.log'd each one, then experimented to
      // to find out how to get the actual content
      title = title.title[0].plain_text || "";
      description = description.rich_text[0]?.plain_text || "";
      published_at = published_at.date.start;
      draft = draft.checkbox;
      slug = slug.rich_text[0]?.plain_text;
      // If I forgot to create a slug, create one
      if (!slug) {
        slug = slugify(title);
      }
      currentSlug = slug;
      tags = tags.multi_select.map((ms) => ms.name);
      mastodon_id = mastodon_id.rich_text[0]?.plain_text || "";

      // I create front matter by taking in these properties
      // and printing them inside triple-dash to match front
      // matter format
      const frontmatter = FRONTMATTER_TEMPLATE({
        title, description, published_at, feature_image: path.join(slug, imageName), draft,
        slug, tags, mastodon_id, notion_url, notion_post_id: id,
      });

      // to be continued...
A note about how Notion works. What powers Notion is its Block style editor.
Each paragraph is a paragraph block, each image is an image block and so on.
When you type / inside Notion, it will
give you options to choose from all sorts of blocks.
To render content from these to HTML takes a bit of work. Fortunately, it’s been mostly done for us by Kerwan who’s built notion-render Javascript package.
      // continues from above

      // you can do this on top level of your file, I added it here for context
      const { NotionRenderer } = require("@notion-render/client");
      const renderer = new NotionRenderer()

      let html = await renderer.render(...results);

      // I do additional formatting to make it prettier
      const prettier = require("prettier");
      html = await prettier.format(html, { parser: "html" });

      // Combine front matter with rendered HTML
      html = `${frontmatter}\n${html}`;

      // Write to file
      const blogPostFile = path.join("posts", `${slug}.njk`);
      fs.writeFileSync(blogPostFile, html);
    }
  )
}
Above is a bit simplified example that probably cannot be run via copy-paste as-is because I cleaned up a lot of my custom things for how I like to format things and all the conditionals to make sure it reacts well to different cases. But I hope it gives you and idea of what’s involved.
How I deal with alt text?
There’s one glaring accessibility issue with Notion: you cannot add alt text to images. What I’ve done is to use Notion’s image caption mechanism and then I’ve written a custom image renderer to Kerwan’s renderer:
const { createBlockRenderer } = require("@notion-render/client");

// Create your own renderer
const imageRenderer = createBlockRenderer("image", async (data, renderer) => `<img
      src="${imagePath}"
      alt="${data.image.caption[0]?.plain_text || ""}"
  />;`
)

// Replace the original NotionRenderer initialization with this
const renderer = new NotionRenderer({
  renderers: [imageRenderer],
});
Now I can write captions in Notion that are then used as alt text when the HTML is rendered. It’s also kinda nice because I can now immediately see on a glance which images in my blog posts are still missing their alt text.
I also do a few other things that I omitted from above:
-
Inside my
imageRenderer, I also download the images from Notion to local folder and then use that image path in the<img> -
I have a custom
codeRendereras well to make my code blocks more compatible with my Prism.js highlighting - I add the Notion page ID and URL to each blog post’s front matter to make it easier for me to edit the contents (by clicking the URL) and redownload the post (with the ID). They are not used anywhere in the built HTML that users see.
- I have a few extra options I can pass to my script to better control what I want to download from Notion.
A few weeks ago, I built a Mastodon comment system to my blog. The way this works is I first write the blog post and publish it. No comment section is visible. I then make a Mastodon post about it, copy the post ID and add it to the properties in Notion table. Finally, I redownload the post to get the ID to my final version and publish again. Comments are now available!
If I ever want to post a blog post without enabling commenting (or remove
later), I leave the mastodon_id column
empty for that blog post. I’ve planned to have an addition that allows me to
moderate individual replies by adding their IDs to a list but I’ll make that
happen
once I actually need it for the first time.
What happens if Notion goes down?
The way I’ve built my headless CMS integration both with Ghost and now with Notion is that if something happens to my CMS (servers go down, company goes bankrupt or something else), the only thing I lose is my drafts that I haven’t backed up.
Since I always copy the content to my local code base and don’t download it at build time but as a pre-build step, I won’t lose any downloaded blog posts. I also always have the possibility to write a blog post as a pure Markdown file – they are treated equally in my build process to the ones downloaded from Ghost or Notion.
First impressions with the new setup
My first impressions are great. The build & deployment workflow feels so much lighter, Notion feels amazing to write blog posts in and I’m excited for its customizability. I also built a similar integration for my Weeklies and it’s a way simpler one: there’s no main content, everything is stored in table rows as properties and then rendered into a list on the website.
I built Mastodon comment system already before the rewrite but it’s been really nice too, I’ve been happy to see people comment and then have those comments appear on the site. I hope it will encourage people to comment more: seeing it in blog may encourage someone to jump to Fediverse to comment or someone seeing it in Mastodon may get encouraged to read the blog.
One thing I like with Notion over Ghost is that I can do partial links. In
Ghost, the hyperlink mechanism had a validator to only accept full links. With
Notion, I can add a link to /blog so it
will always refer to the correct environment (dev, preview, production).
Thanks to Notion’s structured Block editor, downloading images from blog posts and storing them in correct place and fixing the source links is a delight with those custom renderers. I tried doing it with Ghost initially but couldn’t make it robust so I skipped it. What it means to me is I have to manually migrate ~500 images in blog posts from Ghost to my local code base.
Most importantly with Notion, I can now finally add all the extra properties to my blog post metadata that I couldn’t with Ghost, making it possible for me to build new features.
One feature I already have built but not super much in use yet is related
posts. For some older blog posts (and during this rewrite, I added bunch
manually) I already have a
related_posts field where I can add
other blog posts and they get shown in the sidebar of the blog post! Now with
Notion, I can start doing that inside Notion table and even do it with
dynamic relations, linking to other entries in the table.
With the new and fresh code base, I feel more excited than ever to start working on new features to take it to even next level, while continuing to have a great writing experience that will help me maintain my regular blogging schedule.
One downside of Notion is that it’s not open source and I can’t self-host it, meaning I’m at the mercy of the company for the future. But as I noted in the section above, the worst is I need to write new blog posts in Markdown while setting up a new headless CMS.
If something above resonated with you, let's start a discussion about it! Email me at juhamattisantala@gmail.com and share your thoughts. This year, I want to have more deeper discussions with people from around the world and I'd love if you'd be part of that.
Comments
Loading comments...
Continue discussion in Mastodon »